Super Stealthy Mission at the Parade of Homes

Monday, June 29, 2009

Hey there - I hope everyone had a great weekend! We had our annual Parade of Homes going on, so I decided to take a gander through a few of the houses. I can sum my experience up in one word "Tuscan". It was everywhere! Don't get me wrong, the whole dark-aged wood, faux treated brown walls has it's place in the design world...but seriously people....EVERY SINGLE HOUSE?!

So imagine my delight when I walked up to the last house and saw a sign by the front door that read "designed with an east-coast cottage aesthetic"...stop-the-world! My eyes were as big as saucers when I walked in and saw clean, crisp white molding, and this chandelier in the dining room!


I thought "Ha! I've seen that chandelier online before and lusted after it! I can't believe it's in this house!"....Um..by the way...I've never claimed that I'm not a complete dork.

The realtor saw my excitement and raced over like Winnie the Pooh to the honey jar. I told him I wasn't in the market for a new house, but that it was absolutely beautiful and would he mind if I took a few photos (and batted my eyes the best I could)? Apparently I wasn't very convincing because he said NO photos. Blast! Can you believe that? He said "That's how our designer's make their living. We can't have people copying it." And I said (in my best empathetic tone), "Oh, I completely understand, but I was just thinking of taking photos for myself for my own reference - Not to publish on the internet or anything (wink wink, nudge nudge)." Yeah...still NO.


So I wandered around the house soaking in every detail....dark hardwood floors, grey toned walls, brushed nickel fixtures, travertine in the bathrooms...and just as I was about to pull out my camera like a super-spy to steal some photos of the master bathroom Mr. Realtor came in and said..."Ok, if you hurry you can take a couple pictures of the kitchen, but if anyone else walks in you have to stop." Well...ok then.

So here's what I was able to snap while Mr. Realtor nervously loomed over me (you can see him in one of the pictures).


Great quality photos, eh? But you get the idea, right? White cabinets, a black island, a farmhouse sink...ahhh, absolutely divine.


Sooo, that was my little adventure over the weekend. I did learn one thing, though, I'd make a really bad spy :-).

How to make a "Chandelabra"

Thursday, June 25, 2009

While planning my master bath redo, I knew I wanted a chandelier over my bathtub. The ceiling over the tub wasn't wired for electricity, though, and I didn't want to have to tackle the task of pulling wires myself (or hiring someone to do it for me). Soooo, I decided a "chandelabra" was the way to go (oh, and for those of you that are wondering...it's a fancy name for a chandelier that holds candles...I'm just fancy like that {eyeroll}).

I looked and looked...and looked for the perfect chandelabra, but I couldn't find anything for a reasonable price (I've seen like 5 since, but oh well...). It was when I spotted this baby in the corner of a garage at an estate sale that those gears in my little brain started spinning.


Of course! Why couldn't a regular chandelier be used as a chandelbra? And it was only $16...yes, that's right $16... so I couldn't pass it up.

I removed the metal plate from the top of the chain, and then gave her a coat of black spray paint, and popped short white taper candles in.

She needed a little something extra though (have you noticed how everything in my house seems to be a "she"?), so I bought some "crystals" on Ebay (I'm pretty sure they're plastic, but shhhh....don't tell anyone). I would give you the seller's name, but this was a one time deal for her so it wouldn't be helpful to you. There are plenty on there though.

I also sewed a cover for the chain (which was important since I wound the wires down through the chain and they needed to be concealed). I made the cover in the easiest, simplest, even-a- caveman-could-do-it kind of way.


Step 1: I simply held some fabric up to the chain making a little pocket around the chain. I held it so it was tight enough that it wouldn't slide down, but loose enough that it would comfortably bunch up (I totally eyeballed this), and then I made a little mark on each side of the fabric where the seam should go.

Step 2: I cut a strip of fabric, leaving maybe 1/2 inch on each side of where the seam would be. I also made the cover longer than the actual chain (maybe 1/3 longer?) so it would bunch up a little...can you tell how completely unscientific this process was?

Step 3: I folded the fabric lengthwise and pinned along where the seam would go. I then hand stitched along that line (don't worry, it didn't take more than 10-15 minutes). Oh, and I didn't even hem the top and bottom....seriously, once they're tucked under who's going to notice?

Step 4: I slid it over the chain...and laughed at how surprisingly good it looked despite my haphazard cavewoman approach :-).

I then hung my dolled up chandelabra from the ceiling with one of these handy dandy ceiling anchor swivel hooks (except mine was black). Worked like a dream.


Have a great weekend!
~ AnNicole

Hunting and Gathering at TJ Maxx

Tuesday, June 23, 2009

I have had a long term love affair with TJ Maxx. It started years ago when the first TJ Maxx opened in Salt Lake City and my mom and I would peruse the racks looking for that one great deal...like mighty (but cute and ever so stylish) huntresses stealthily tracking our prey (oh and I'm pretty sure "stealthily" isn't a word...but like I tell my son when he teases me..."I just used it, you understood what it meant, and therefore it's a word"..hee hee). Anyhoo, once a second TJ Maxx opened we would go to one "TJ" and then see what we could find at the next. Ahhh, such good times.

So it shouldn't come as a surprise to you that one of my favorite places to "hunt" is TJ Maxx. I did a little "hunting" over the weekend and here are some of my...um, I hate to say "kills" so instead I'll say "finds".

These tea cups were love at first sight. True, I don't drink tea very often, but I could...these cups might be reason enough to host my own little tea party. And actually I love that in Europe they seem to drink coffee from small "tea cups" rather than ginormous mugs. So yes...I bought them - and really, I spent $12.00 for four cups and saucers...so I'm not exactly breaking the bank here.


Layla at The Lettered Cottage showed this adorable wire cloche on her blog last week. I'd seen it before and almost bought it but was trying to be super thrifty so I passed it up...and then continued to kick myself for weeks (especially since they were all gone when I went back to buy one). So imagine my joy when I found this baby at a different "TJ" over the weekend. I pounced...like the good huntress I am.


Finally, aren't these placemats and napkins fab? They're so soft, so beachy, so casual, so inexpensive. They just had to come home with me.


Happy hunting!
XO ~ AnNicole

Master Bathroom Reveal

Sunday, June 21, 2009

I hope you're not tired of hearing about my master bath (since it was all I talked about last week), but I promised I'd give you a bigger view once it was put together a bit more. There's still more to do, but it's finally starting to come together. Yeeha!!

Oh, and I should mention...I NEVER would have gone this direction with the bathroom if I had an intention of selling any time soon (ummm, blue-green vanities aren't exactly on most buyer's wish lists). But I know it will be easy to change if I do sell at some point, and for now it makes me happy...which is what matters right?

I still need to add something between the mirrors (trying to decide what...)
and I need to replace the faucets. I'd like to add "feet" to the vanity too.

And see? I really will be installing new faucets. I'm just waiting for the second faucet to arrive...you know because a smart person installs both at once....and I try to be smart and sensible every once in a while :-). They're the Delta Victorian faucet, and I bought them on Ebay. They retail for something like $200 and I about one for $65.00 and one for $35 (used but in perfect condition).

The chandelier is actually a real chandelier (um...obviously...but I mean it's wired for electricity and bulbs and all that) that I found at an estate sale for $16. I sprayed it black and added candles and crystals. I hung it from a hook in the ceiling (with an anchor)and sewed a little cover for the chain.

I found the shelf at a flea market and shopped the house for candles and other goodies to dress it up. The vintage bottle was my grandma's. She loved antiques as much as I do.


And...one more BEFORE picture just for comparisons sake.

The best part? I was able to give the bathroom a new look for very little money. I did the math, and between paint, faucets and accessories I spent about $250. Yes, I'd love to retile the floors, retile the tub surround, add a nice stone counter, etc....but for now, this bathroom feels soooo much better to me than it did before. I firmly believe that anyone can improve their surroundings regardless of the budget they have to work with. All it takes is a whole lot of creativity and a little elbow grease.

"Glaze Craze" or "Don't Stress the 'Distressing'" ..Ha!

Tuesday, June 16, 2009


Thanks so much for your patience in waiting for a post about how I painted/glazed my bathroom cabinets.

First, I need to say that my existing cabinets were already painted so It was pretty easy to just add a coat of paint and then glaze. If your cabinets are wood then you'll need to go through a process that's a little more involved. You can read this post a did a while back about painting the uhh-gly honey oak cabinets in my old kitchen. You would follow that process prior to glazing.

So here's how I painted/glazed my bathroom cabinets. I promise it isn't hard. Seriously, if you can paint you can glaze.

You'll need the following:
Primer (optional)
A can of your base paint color (I used Benjamin Moore Wythe Blue)
A can of glaze mixed with paint (I used the Ralph Lauren brand from Home Depot)
Good Paint Brushes (I used a 1-1/2 inch brush with an angled tip)
Foam Roller
Lint Free Cotton Rags (I bought a package from Home Depot, but a clean old t-shirt would work too)

PREP WORK

Step 1: Clean the cabinets really well. I just used a little dish soap and water, and let it dry completely before painting. You just want to make sure you don't have any dust, grime, grease, hairspray, etc, etc on the cabinets when you paint them.

Step 2-3: Ideally you remove your doors from the cabinet base and prime with a good primer (like Gripper or BIN). I wasn't nearly patient enough to do either of those things, though, so I skipped these steps. I know...I'm such a rebel aren't I :-).

PAINTING YOUR BASE COLOR

Step 4: Paint your base color onto the cabinets. I used Benjamin Moore Wythe Blue (although Stratton Blue would have looked great too....it's a shade darker). I did 2 coats, waiting 4-6 hours between coats. I also used a good paintbrush for the detailed areas (I must emphasize the importance of a good paintbrush...it will help avoid brush strokes!) and I used a small foam roller for the flat areas.

Step 5: I let my paint dry 24 hours before applying the glaze. When painting cabinets (and any other furniture) dry time is key. I KNOW how hard it is to be patient, but allowing the paint to dry (or "cure") completely will save you many headaches in the future.


APPLYING THE GLAZE

I used a Ralph Lauren glaze mixed at Home Depot. They mixed the glaze with a color called Tobacco. I really should have gone a little lighter with the glaze color, but it's not the end of the world. Ideally, your glaze should be darker than your base color, but not super dark. You want it to be dark enough for there to be an obvious difference, but not so dark that the difference screams at you. I hope that makes sense.
Step 6: Use one of those good paint brushes you bought (because you're soooo obedient) and brush the glaze on in small sections. It dries quickly so you don't want to apply the glaze to too big of an area at once. Oh, and a word of advice...once you paint the glaze on and see brown slime over your cabinets you could panic and say "Oh my gosh, I just ruined my newly painted cabinets!" Don't worry, most of it will come off!


Step 7: Use a lint free cotton rag to wipe the glaze off. Gently wipe off most of the glaze, but leave just enough to show a bit of a patina. You'll leave a little more glaze on in detailed areas like edges, and around trim. Keep in mind, the glaze usually dries just a tad darker than it looks when you're working with it. So keep that in the back of your cute little brain when you're deciding how much glaze to leave on. Your goal is to have a patina and some depth. You DON'T want to make your cabinets look dirty, and leaving too much glaze on will make them look dirty.

So the glazing process in a nutshell is: 1) paint on glaze in a small section; 2) wipe off most of it immediately leaving just enough for a patina; 3) move on to next small section....and ta da! You're done! See...I told you it wasn't hard.

I hope this was helpful. Feel free to let me know if you have any questions! Oh, and I PROMISE I'll show you more of my bathroom soon. I still have to put paint cans, hammers, and a whole bunch of junk away. Ahhh...the magic of photography :-).

Tell Me More...

Thanks so much for your kind comments on yesterday's post. I can't tell you what a relief it is to finally have my bathroom coming together!

I promise I'll show you the full bathroom once it's all pulled together (I still have to install faucets, a new light fixture, etc.), but I thought I'd answer a few of your questions today.
A few of you asked about my "Keep Calm Carry On" poster. I bought it a couple years ago from Sfgirlbybay's Etsy store. She still carries this seafoam aqua color (click here), and she also offers other great colors. I know everyone has this poster now, but I don't care...I still love it. Seriously...a cute crown and a nice message? How could I not love it?!


I filled my apothocary jars with some bath salts I already owned, some cheap Method Brand soaps from the grocery store (I'd prefer fancy ones, but I'll have to save up for those), and some sponges I found in the art department at Hobby Lobby. Yep, they have sea sponges over by the painting supplies.


I found my locker basket at a local flea-tique store. I saw it a few weeks ago, but left without it (I know...feel free to smack me). I went back to the store over the weekend and miraculously it was still there! I snatched it up immediately. I know you can buy them on ebay as well.


Finally, a few of you asked about the painting technique I used on my bathroom cabinet. Tune in tomorrow for a full post on painting and glazing cabinets! (Ummm, is there any chance the exclamation point makes you less angry at me for making you wait an extra day?...lol).

Have a great day!

Sneak Peak: Master Bathroom!

Sunday, June 14, 2009

I thought I'd give you a sneak peak of of what I was able to do in my master bathroom over the weekend...ok, that sounds weird...I mean the painting and decorating I was able to do in there. Yeesh..


More to come!

P.S. I guess I know who to call if I ever get a few free tickets to France! Wouldn't that be amazing? Ahhh, it's so fun to dream.

Let's Play Pretend Shall We?

Thursday, June 11, 2009

If you could do anything this weekend, what would you do? Yes, spending time with our families is wonderful, and I'm grateful for everything I have....but let's just play pretend today shall we?

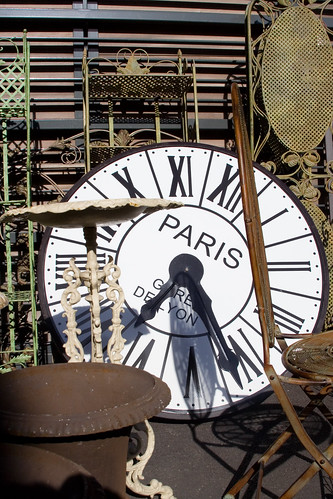
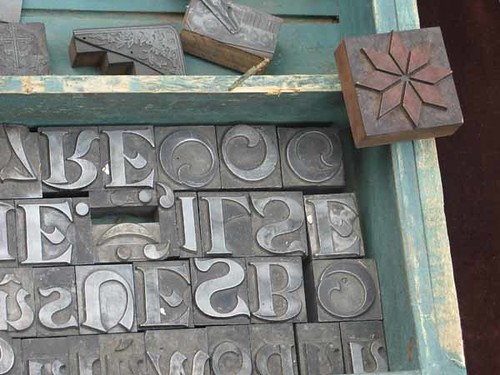
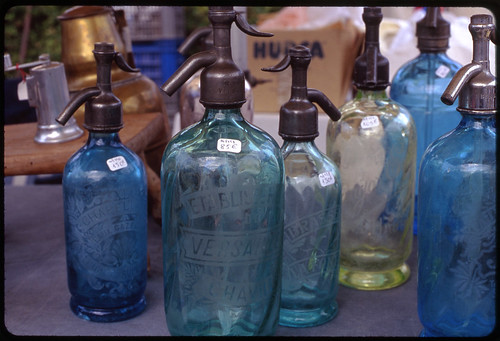
If I could do anything this weekend, it was a toss up for me as to whether I'd rather lay by the pool at a posh resort in Hawaii, or go to France...but I chose France (like any of this is real anyway...lol). The reason I chose France is because I would love, love, love(!) to go to a Parisian Flea Market. Maybe it wouldn't be as wonderful in real life as I imagine it would be, but again, we're pretending.

Image: Flickr - Extranoise


Image: Flickr - Bob Blah Blah


Image: Flickr - Ellebee Studio


Image: Flickr - Moufle


Image: Flickr - Ellebee Studio


Image: Flickr - Ellebee Studio


Then I would have a lovely cwah-sont (aka croissant) and one of those fancy European coffees and I'd be set...seriously.


Thanks for playing pretend with me. Have a great weekend!

The Vote is In/Random Wisteria Inspiration

Wednesday, June 10, 2009

Thanks so much for all of your feedback yesterday! The vote is in and Danny Gokey won! Just kidding... Actually, it was pretty clear that you all love the blue-green vanity (option 1). I was leaning in that direction, but my head is so deep in the project I wasn't sure if it was just my fatigue and desperation talking. So I really appreciate your comments.

So yes, I'm going to go ahead with the blue-green vanity and I'll be sure to let you know how it turns out. I also appreciated the comments from those of you that had other ideas for me. Believe me, I took those into consideration and I may incorporate some of them into the room as well.

A few of you mentioned replacing the faucets, and BELIEVE ME, I'm right on board with you. In fact I just purchased one of these Delta Victorian faucets 0n Ebay (and I'll be buying another soon)....I'm sooo excited!

And since I can't ever publish a post without showing you something pretty, I thought I'd share a few random items I was lusting after on Wisteria's website today. They're not necessarily cheap, but boy they're pretty :-).

Medium Bird Glass Cloche


X-Back Chair with Stripe Cushion

Treasure Nest (Bluejay)


Delightful Doormat - Crown
Garden Stools
Through the Looking Glass Table


XO ~ AnNicole