Don't fear the power tools.

Thursday, May 28, 2009

Hello all! It's Sarah from Thrifty Decor Chick here for a guest post! My friend AnNicole is off traipsing around Germany...well, really, she's "working" (sure AnNicole). I like to think she's frolicking around in fields of tulips or something. (Or is that Holland?)

Whatev.

Anyway, I am so excited to be here at AnNicole's place! And I have one mission with this post -- that you will no longer fear power tools.

Tools are not just for your Dad.
They are NOT just to walk past in Lowe's on your way to furnace filters.
Tools are not just for your Hubby to hoard and use "when he has time," or "when I get home from work," or "woman, will you get off my back?!"

Sorry. You get my point. I once was like many of you...my tool skills consisted of twisting a screwdriver to put furniture together. I was even confused when it asked for a "flathead" screwdriver. Wasn't there just one kind?

When we moved into our house, I discovered my love of all things molding. At this point, my experience with tools had graduated to an electric drill. Upon the direction of my father, I went and got myself a purdy little yellow miter box that comes with a hand saw:

With that miter box, some glue, a hammer and nails and a level, I dressed up our columns:

And fancied up the entry as well:

My love of tools was growing, but I was still hesitant to try out anything new (read: more powerful). Enter the nail gun. My sweet, sweet Lovely:


Three years ago when I was pregnant, my Dad and I made these built-ins together -- for less than $200 for two of them:

It was on that glorious day I used the nail gun for the first time. I still remember the first shot. And good God, it was FUN! I believe I put about 30 extra nails in each time just for good measure. (Dad had to stop me because we were running out of nails.) It was that fun, that empowering.

And from that day on I was hooked. Dad just gave me his nail gun -- he could see the little hearts coming out of my eyes. So with that, I went crazy and did this with beadboard:
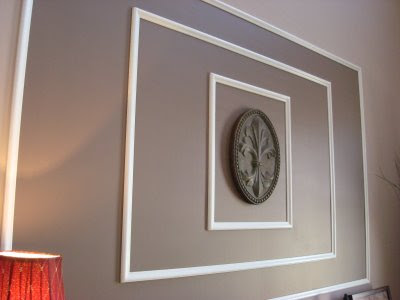
And most recently, did this in our living room: But there was still one power tool that alluded me. The compound miter saw...

And this one I really was scared of. I mean, this thing is heavy duty. But one day, while working on my beadboard island:

My hand was about to fall. off. from all the cuts with the miter box, and the saw was only $108 on clearance at Lowe's. I splurged and got it. I was scared the first time I used it and then never again. It is my new Love. The possibilities are endless with you my dear...

I hear it ALL the time -- not just from readers, but from friends..."I'm too scared!"

Well, don't live in fear ladies. I know some of these tools look ominous. But once you learn how to use them, and realize they are all made so that it is hard to mess up when using them, I guarantee you won't be as hesitant.

Here are some tips if you are going to take the plunge:

1. Start small. The miter box is, in my humble opinion, the easiest tool to use and is the smallest but does the biggest job.

2. If you've never used a power tool, PLEASE have someone show you how to use them. Honestly, once you've done it yourself I promise you'll feel a 100 times more comfortable with it. But until then, let someone show you how to use it, even if it's the sales guy at Lowe's.

3. Most of the time there's no reason to be scared. You need to be cautious with tools, you need to take your time, and you should never skip important steps (like wearing eye protection when using the compound miter saw.) But it is nearly impossible to nail into something with the nail gun unless you are using it correctly. The electric saw blade is protected until just before it hits the wood. If you are using them correctly, they are truly, truly easy to use.

Don't wait. Don't wait for your husband (unless you have a really handy one -- lucky you if so!!). Don't wait till you have enough money to hire someone (you can rent these tools). If you want to make your home more lovely, don't wait.

I promise you can do it. Cross my tool belt heart.

You Say it's Your Birthday? It's My Birthday Too Yeah!

Friday, May 22, 2009

Yep, it's my birthday. I LOVE birthdays...even though I'll be working most of the day and then packing like a crazy person tonight, I still love a day where you can have whatever you want for dinner (Mexican food in my case) and eat chocolate cake without remorse.

I just had to share what my sweet son did for me this morning. I walked out of my bedroom and he had taped notes all over the house wishing me a Happy Birthday. Some of them are pretty funny (oh, and please disregard the penmanship).

"Happy Birthday Mom! 33"


I think this one's my personal fave. It made made me laugh out loud. It's like a birthday wish and a glimpse at my tombstone at the same time!

"Today is AnNicole's Birthday (or the best mom in the world)." I swear I didn't secretly write these myself.


"Happy Birthday to the lady that always makes awesome breakfast on Sunday." Which is nice considering the whole blue cheese omelette fiasco last Sunday.


"Happy Birthday for the woman that is always more than eager to watch tv with me." Hmmm...is that a good thing?

He even did one from the dog. Which is also a friendly reminder to fill her food and water dishes before I leave.

"I hope you have a great birthday! Love, Matthew" Ok - that makes my heart melt!

I hope you all have a great Memorial Weekend (in the U.S.), and remember to tune in next week for some great guest posts. I'll see you in a week!

Go Monkey Go!

Tuesday, May 19, 2009

I'm in love...with an Etsy store. I know...as a single gal I should probably expand my love horizons a bit, but seriously if you check out this store you'll understand what I'm talking about.

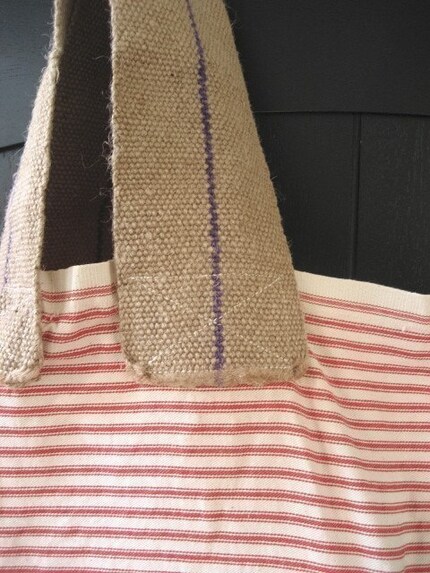
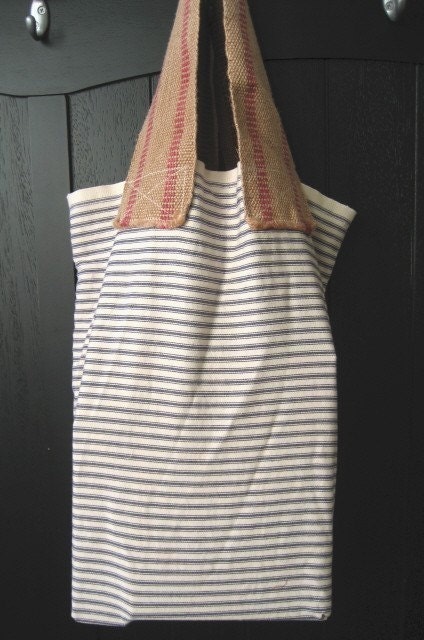
It's called Go Monkey Designs and I showed you one of their great ticking stripe bags in a post last week. After I published the post, however, I spent a little more time exploring their shop and I fell in love with at least 10 different items...I kid you not. See for yourself....

I can't decide if I want red...

or blue.

Perhaps one of each? They're only $16.50 afterall.

And isn't this skirt adorable?! It's so fun and playful, and yet work appropriate.


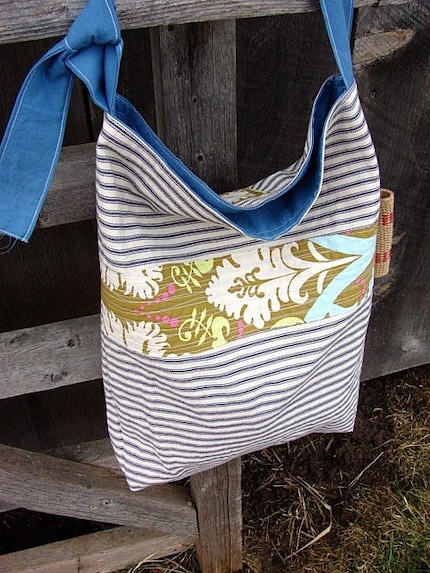
And wouldn't this "Spring Fling Granny Bag" be perfect for tooling around town on a bright, summer day? I can just picture it paired with faded jeans, a white t-shirt and an iced coffee...and a scone...so many possibilities.

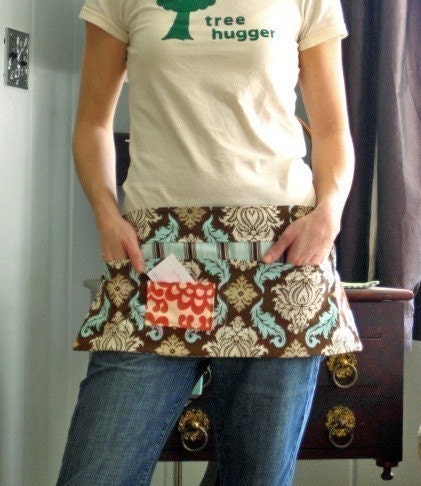
And how about this adorable little apron? I think I need an apron. I don't cook very often, and I'm not terribly messy...but wouldn't it be so much more fun to cook with a cute little apron on?

Do you see what I mean? I love how the store kind of has a laid back French feel. And honestly, they had me at "ticking stripes". Enjoy!

Batty for Board and Batten

Sunday, May 17, 2009

A few weeks ago my friend Raissa emailed me and asked how I did the board and batten treatment in my kitchen because she wanted to do something similar in her powder bath.

(Here's my board and batten, so you can get an idea of what I'm talking about)


Honestly, my board and batten treatment is quite primitive. All I did was nail poorly cut lattice strips under an existing chair rail and paint everything white....I'm planning on redoing it at some point. So, instead of telling her to do what I did, I suggested that she copy what Karla at It's the Little Things That Make a House A Home did. Here's the link.

Here's Karla's family room. Isn't it beautiful?!

So...since Raissa doesn't let any moss grow under her feet (is that the saying?...) she jumped on the project right away...and I was BLOWN AWAY when I saw the finished product.

First the BEFORE photo


And AFTER!!!


Isn't it incredible?! Are you as blown away as I am? Of course...how could you not be?!

Again, check out Karla's fab tutorial for specific details on how to do this yourself. If you're like me you'd also be dying to know what the paint colors are that Raissa used. She used Sherwin Williams Artifact on the upper wall (you can't go wrong with this color) and Sherwin Williams Dover White on the wainscoting.

Bravo Raissa!

How I Painted My Front Door...Don't Ya Love Creative Titles?

Friday, May 15, 2009

Thanks for all of your nice comments yesterday about my "new" front door. I'm really happy with it.

I thought I'd follow up today with a quick post today about how I actually painted the door.


I didn't prime the door because, A) the existing finish on the door was already fairly dull, B) the previous owners had already primed and painted the plastic window thingy (a very pale tan)...thanks previous owners!, and C) I'm a tad bit lazy and I try to avoid priming when I don't have to...just keeping it real here.

I used Behr exterior paint in a satin finish, and asked the guy at the counter to mix it in a true black. I went with satin rather than gloss, because I prefer a more subtle finish, and glossy doors can show more paint strokes than less glossy doors (somebody get me a thesaurus please...).

And speaking of brush strokes, I really wanted to avoid them, so I only used a paint brush on the detailed areas of the door and window. I used a foam roller to paint everything else (which also made the painting go by in a flash).


I also forced myself to wait 4 hours between the first and second coat.

And that's it. It really was sooo much easier than I thought it would be. Really, the toughest part was taping off all of the sections of glass...and with the help of painters tape and an exacto knife it really wasn't that difficult.

Have a great weekend everyone!

Par-tay at The Inspired Room!

Wednesday, May 13, 2009

Melissa at The Inspired Room is having a linky party today. Melissa was struggling with that little thing called motivation to tackle a few painting projects that had been hanging over her head (um...can anyone else relate to this?) and she challenged others to join in and cross a few of our own projects off our lists.

I managed to cross one item off my list. Oh yeah, hold back your applause..."She did one project everyone! Find the confetti ASAP!". In all honesty I would have tackled a couple more projects if we'd had more than 3 hours without rain in the past month...but you know, that's how the fortune cookie crumbles (or something like that).

So, here's what I did.

See this burgundy door that is just screaming "Hey there! I am a full fledged, 100% certified suburban door." I've hated it since I moved in. It's just so...generic...so tract home (no offense to anyone else that has a door like this...I'm just absurdly sensitive to silly things like door colors).


Soooo, I finally did what I've been dying to do for a year and painted the darn thing a nice black in a subtle satin finish.


You'll notice that I ended up painting the plastic window frame thing too because, really, classic doors don't have white plastic window thingies....as far as I've observed.

I love it. I'm so happy with the change. And the best part? It took maybe 2 hours (excluding dry time) and $12 worth of paint. C'mon...you can't beat that.


I still want to paint some oh so fancy and charming numbers on the door, like these from It's the Little Things that Make a House a Home, but that's still on my list. I like to tell myself I'd be bored if I didn't constantly have more items on my to do list.

I also really, really need to spray my patio chairs black. This is one unfinished project that kind of eats at me and I know it will be a HUGE relief when it's finished and we can finally relax on the patio in style. Again, I need dry weather to get this done, though. But that's ok...I'll be patient...no stress...no stress :-).

My advice? Pick ONE project and make a plan to tackle it. Don't let yourself become overwhelmed by your whole list, just focus on one item and get it done. And when that's finished focus on one more. It's no fun being overwhelmed by a mountain of projects hanging over you....and if it's not fun, what's the point?

I Love Me Some Ticking Stripes

Sunday, May 10, 2009

I don't know what it is about ticking stripes, but I just can't get enough of them. I love their simplicity, their casual feel, and their French (or Swedish) vibe. Here's some eye candy for you.


Photo Credits: 1. Country Living, 2. Etsy - GoMonkeyDesign, 3. Pottery Barn, 4. Cottage Living, 5. The Home Book, 6. Pottery Barn, 7. Etsy - RuralMamma

Happy Mother's Day!

Friday, May 8, 2009

Disclaimer: I'm taking liberties today to write an incredibly sappy post that has nothing to do with decorating. Hate me... :-).

I love Mother's Day....not so much for myself, but because it gives us a chance to recognize all of the fabulous mothers out there and the monumental contributions they make to our lives.

First, I am so inspired by each of you. I love seeing your never ending creativity, your love for your children and families, your imperfections which help me to know that it's ok to be imperfect myself. I learn from you and I am constantly fueled by each of you and your examples. So thank you, and Happy Mother's Day (and if you're not a mother, I wish you a Happy Woman's Day).

I also have to tell you that I have the best mom in the entire world. I really do. She's one of a kind, and I can't tell you how grateful I am to have a mom that would do almost anything for me. She's literally my best friend. I can tell her almost anything and I know she won't judge me or think I'm crazy. She'll listen to me rant for hours about anything from which wall color I should pick, to junk about work, to "Oh so this lady at the grocery store said this...and then I said this...". You know what I mean? How many people in your lives are you really able to do that with.


Thanks mom! I wouldn't be the person I am today without you.

Happy Mother's Day everyone!

Paint Sample Tip

Tuesday, May 5, 2009

I thought I'd share a little tip with you that I devised over the weekend. I'm planning on painting the hallway at the top of our stairs, and, I don't know about you, but it makes me really nervous to pick a color based upon a teeny tiny 1 inch by 2 inch card (or even the slightly bigger 3 inch by 4 inch ones). So, whenever possible I get a little sample of the paint before I make a decision.

The problem, however, is that I usually like to see how the color will look in different areas of the room, (you know...different lighting, furniture, etc.) and it can be a pain to paint samples on every wall in the room. Soooo, why not just apply the paint to a large piece of paper that you can move around as you please?


Easy peasy....

Oh...and yes, I'm aware that the two paint samples are nearly identical. And no, I didn't need to the 2 guys at the Lowe's paint counter (and my 14 year old son) to point that out...and then snicker to each other...and point at the crazy paint lady. I'm very particular about my paint colors, okay? :-)

Giveaway at The Lettered Cottage

In a shameless attempt to win this oh-so-wonderful-I-could-squeel monogrammed burlap table runner (and to give you a chance to win it too...and give me your address so I can swing by and steal it from you in the middle of the night) I'm letting you know that Layla at The Lettered Cottage is having a giveaway that you can check out here.
The table runner is by Grace who has a fabulous Etsy Shop called Coastline. Here's the link to her shop.
____________________________________________________

I also have the best readers in the world, and a few of them have been kind enough to honor me with two awards. The first is from Tia at Tia's Comfy Place.

The second award is actually from two great ladies, Karla at the fabulous blog It's the Little Things that Make a House a Home, and the wise and wonderful Elizabeth at Thoughts from an Evil Overlord.


THANK YOU!!!

IDHTBPTBB - An Ode to The Nester

Monday, May 4, 2009

Head on over to the Nesting Place today and you can sign up to receive both a (somewhat) regular newsletter and the Nester's own ebook.


I try not to talk about the Nester too much because I don't want to seem like a crazy stalker or (even worse) a wannabe...I am my own person after all. But I have to tell you how much I love her and her philosophy of It Doesn't Have to be Perfect to be Beautiful (also known as IDHTBPTBB...you know, for funzies).

Until I discovered the Nester I didn't realize how much I stressed out about making things look "perfect"...and then kicking myself because I couldn't make my house look as fab as the latest spread in Cottage Living or the Pottery Barn catalogue. The Nester opened my eyes and freed me from that crazy, irrational stress, and she allowed me to embrace my slightly imperfect home.

I really wish I'd had found this enlightenment years ago. For instance, here's the fireplace in the house I used to live in.


I hated it. It's dark rusty brick loomed over me and gave me a stomach ache every time I walked in the living room (and we won't even talk about the fact that this room was totally devoid of my personality...nope won't even go there).

I played with the idea of painting it and building a cool mantle about 20 billion times, but I never did it because I was afraid. I was afraid of what people would think; I was afraid of how it would affect resale; I was just plain afraid. The thing was, the lady that ended up buying the house loved everything else I had done, including painting my kitchen cabinets. In reality, she probably would have been grateful not to have to look at that overwhelming rusty wall o'brick.

The point of all this? Follow your instincts...honor your instincts. Take a risk. If you don't like the outcome you can always try again. There's no shame in painting a room several times until you find that color that makes you smile every time you walk in.

Your home should be a reflection of you and your family. It should make you happy, and at peace. That doesn't take money...that takes a change in your mindset and a willingness to take chances.

Have a great Monday!
~AnNicole