My Favorite Vignettes

Tuesday, April 27, 2010

Beth at Stories of A to Z is having a “Ready Set Vignette” party today, and I really wanted to participate. I hoard accessories, but oddly my own vignettes don’t change very often. Hmmm, maybe if I stopped painting for five minutes they would?… :). So rather than boring you with more photos of the same old vignettes in my house, I also hoard photos of accessories, and here are a few of my faves

This Martha Stewart mantel has been in my “dream home” file for a while. I love the soothing colors and interest of the vintage landscape paintings – especially combined with a simple starfish and a tiny vase that picks up with the green in the paintings. For a similar look be on the lookout for vintage paintings at thrift stores and “flea-tique” stores. I see them all the time. And you can paint unsightly or uncoordinated frames in matching colors that you draw from the paintings.
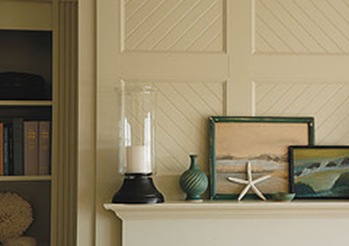
Martha Stewart Mantle

I love this BHG vignette below. I hope you haven’t already seen it too many times. Ahhh…the combo of white/black and warm wood. Lovely. This look could easily be replicated with a couple black and white drawings or photos placed in large black frames with thick white mats. Warm wood accents and rustic baskets complete the look.

bhg room

This Country Living vignette is a great example of how repeating similar items can add a lot of interest and result in a a big impact. I love how the topiary kind of breaks up the look too.

Country Living clocks-de-95383731

Oh symmetry…I love symmetry – mostly because it’s fairly foolproof :). In the photo below they’ve created a visual triangle, though by having the birdcage in the center be slightly taller than the lamps on either side (and much taller than the vases). Triangles are good when it comes to creating vignettes. Make your arrangement create some kind of triangle and you’re probably going to be okay.

Catherine - andreas_von_einsiedel2

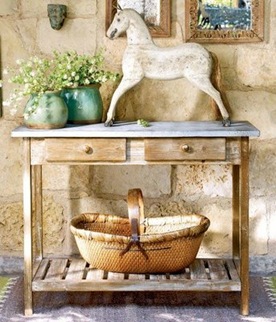
Finally, I love this photo from Ballard Designs. This vignette shows how you don’t need a lot of stuff to have a nice vignette. In a nutshell…go big. The combination of the large items, as well as the varying colors and textures, creates a really interesting vignette.

Wind Lost Table

His and Hers Style: Contemporary Meets Earthy

I thought I’d take a stab at something different today and look at the dilemma of combining two very different styles into one cohesive look. You married folks know what I’m talking about right? Not so easy when your spouse has a heartfelt love of all things Nascar and you prefer…well, anything but :).

Today, we’re pretending she loves contemporary style with clean lines and not too much fuss. He loves all things earthy. Give him wood grain and leather and he’s a happy man.

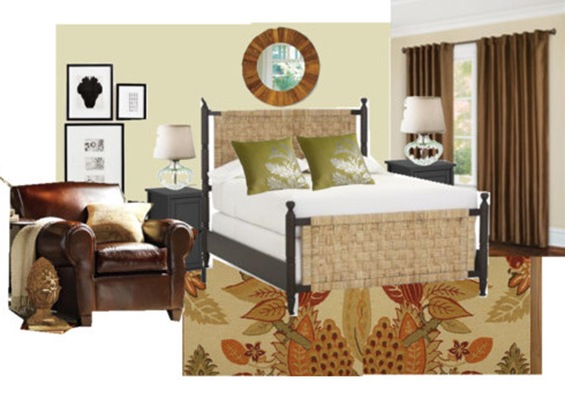
Meet the happy couple’s bedroom:

Polyvore Contemporary Earth Tones

As you can see, Ms. Contemporary and Mr. Earthy have learned the art of compromise. She gets a bed, nightstands, and artwork with stylish and clean contemporary lines, while he gets his manly leather chair and warm earthy colors. They even managed to find a mirror that combines both simple lines and his beloved wood grain. Ahhh, a match made in heaven.

Now, don’t worry. This single gal isn’t going to attempt to give marital advice here, BUT I have a few suggestions when it comes to combining styles.

  • Find a Common Thread: What do you both like (I know…duh)? Even if it’s something as simple as a color, or a texture, that’s something you can build on.
  • What’s REALLY Important To You?: Our contemporary gal would feel completely suffocated in a a room full of intricate details, raw wood and cowhide, right? What’s really important to her is clean lines that let her feel like she has order and can breathe. And, let’s face it, a pristine white room would make our earthy man break out in hives. He really needs to feel the warmth of earth tones around him in order to relax.
  • What Can You Live Without?: In the example above our contemporary gal would probably prefer brighter colors or a nice tone on tone palette, but as long as she has a simple, orderly bedroom she’s content. And our earthy man would rather have a solid oak bed (and he isn’t a big fan of throw pillows), but he feels comforted in his warm hued space.

Feel free to let me know if you want me to do this again, and if so, are any particular styles you want me to try to combine?

Finally, thanks to all of you who entered the Pleated Poppy giveaway! The winner of the set of 3 posy pins is lucky number 81, Stacy from Snow Business.

Giveaway

How I Met My House Party!!!

Wednesday, April 21, 2010

Alright – are you ready to party?! Today we’re sharing stories of how each of us met our house. Remember, you don’t have to own your home, it can be an apartment, and you don’t even have to particularly like the place. I just think the stories will be interesting. Okie dokie, I’ll go first…seeing as this is my blog and my party :-).
 
OSC_Flower_Logo
 
About two years ago I was going through a horrible divorce (is there any other kind?) and I was trying to focus on building a new life for my son and myself. I desperately wanted a home for us. True, we could have created a home anywhere, but I wanted a house that was near my son's friends and that truly felt like a haven to us. Without a big budget, I knew finding a home in our "desired" neighborhood was going to be a challenge - but I wasn't going to give up.
 
One day while looking online I saw a listing for a cute little 1700 square foot brick home in the right neighborhood for the right price. My heart almost jumped out of my chest. The house spoke to me. I know that sounds ridiculously cheesy, but it's true. It said "Hey, I'm your new home. You and your son will be very happy here." I would have made an offer right then and there, without even seeing the inside. The problem? Our old house hadn't even been listed yet, and I couldn't possibly make an offer while still being responsible for another house.
 

I contacted the realtor, and ended up seeing the inside (which only confirmed my love for the house...despite burgundy bathroom countertops and wallpaper borders) and I told the realtor to keep me posted on any offers. I literally called her twice a week asking if “my house” had sold yet.

Here's the magical part...our old, boring house that was in a so-so neighborhood sold within a week of being listed. My beautiful, wonderful dream cottage sat on the market for more than 2 months until I was able to put in an offer. We were being looked out for, that's for sure. 

IMG_0690

Our cottage isn't perfect, but I love it. I love the new life it represents for us; I love its warm embrace after a long day; I love that it's filled with love and laughter. I try to remember everyday how blessed we are and how grateful I am for our beautiful, imperfect little home.

Okay – Now it’s your turn. How did YOU meet your house? Link up your own story below.

sig

Reminder – How I Met My House Party!

First, remember to link up to the “How I Met My House” party I’ll be hosting tomorrow. I’ll actually publish the post at 9:00 p.m. (central) tonight, so hurry and get your story ready! Remember, you don’t have to own your house, and you can live in an apartment, mansion or mud hut. It doesn’t matter. Can’t wait!!! 

OSC_Flower_Logo


sig

Hitches are a Witch

Tuesday, April 20, 2010

So, I showed you my new upholstered headboard yesterday, and alluded to a “blooper reel” I’d be sharing with you. Here’s the thing, I’ve never, not even once, not just one teensy weensy time, been able to get through a project without some unexpected hitch showing its nasty little face. Some hitches are worse than others, and some just seem to multiply within a project, but I’ve come to just expect the little buggers. I now know that at some point whilst working away on a project, a hitch is going to appear.

For example, when I was working on my headboard I originally started using individual upholstery tacks. I traced a straight line in pencil so I would know exactly where to nail each tack. I focused, and squinted my eyes in deep concentration using all of my physical and mental powers to create a straight line with the upholstery tacks. And this is what I got…

IMG_2994

Blast! Gaah!!! Flumpity bumpity!!!

I finally gave in and realized that despite my best efforts, the individual upholstery tacks just weren’t gonna happen. So I got online and ordered upholstery tacks in a strip from this Ebay store…and then summoned all of my miniscule stores of patience while I waited for the tacks to arrive.

Yes, they finally arrived and I was able to finish the project, but my point is…expect the hitch and don’t be afraid of it. Wait for it; watch for it; recognize it when its ugly little head pops up. And then be willing to adapt and change directions to finish the project. But whatever you do, don’t get overly frustrated and give up (or GHASP! never attempt a project again). I promise you it will be worth it in the end to adapt and endure.

sig

OSC_Flower_Logo

Upholstered Headboard

Monday, April 19, 2010

First, I wanted to let you know that you are formally invited to participate in a linky party I’ll be hosting this Thursday, April 22nd where we each share the story of how we met our house. You don’t have to own your house, you can live in an apartment, and you don’t even have to like your house. I thought it would be kind of fun and interesting to hear everyone’s stories, though, so get ready to participate this Thursday!

OSC_Flower_Logo

So, remember a little while back when I shared my bed woes with you? The bed frame was horribly squeaky, and my $30 Craigslist headboard banged against the wall every time I moved. Not exactly the recipe for a relaxing night’s sleep.

You all gave me some fantastic ideas, and after some thought (and a hard look at the budget) I decided to buy a new metal bed frame and make an upholstered headboard.

There are approximately a zillion tutorials out in Internet-land on how to make an upholstered headboard, but I’ll go ahead and show you what I did.

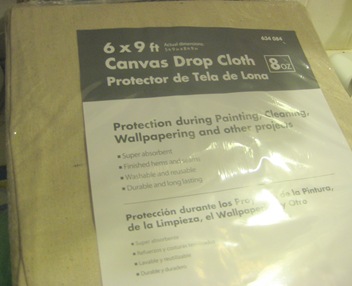
I invested $9.99 of cold hard cash in a drop cloth from Home Depot to use as the fabric. Oh yeah, I’m a BIG spender. It was the perfect color, though, and very durable (and the right price) – so I went with it.

IMG_2986

I then had a piece of 3/4 inch plywood cut to the width of my bed and a height of 33 inches.

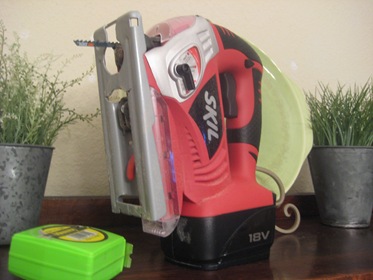
When I got the plywood home, I pulled out my trusty jigsaw and cut a gentle curve into the top of the plywood (This step is totally optional).

IMG_2988

I then cut 1 inch thick foam to the shape of the plywood and then covered it with a layer of batting (which I stapled to the back with a staple gun). And then laid everything over the drop cloth fabric (which I’d already ironed smooth).

IMG_2990

I then (um, I realize “I then” is the phrase of the day here) pulled the fabric taught (but not overly tight) and stapled it in two places on each of the 4 sides, before stapling the fabric all the way around. I made sure I checked the front side of the headboard as I went, to be sure the fabric was smooth. (Probably should have taken a picture of this part, huh?)

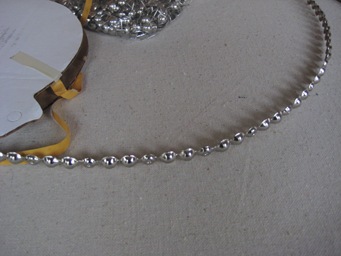
Once I was finished attaching the fabric, I turned the headboard over and nailed a strip of silver upholstery tacks along each side. I couldn’t find upholstery tacks in strips in silver anywhere in my fair city, so I ordered them from this shop on Ebay. I HIGHLY recommend working with the strips instead of individual tacks. I’ll explain more in my “blooper reel” tomorrow, but in a nutshell, the strips are fantastic because you only have to nail a tack in once every third “tack” (a big time saver), and since it’s a strip it’s really hard NOT to create a straight line.

IMG_3087

Once the headboard was finished, I screwed two large D ring hanger’s to the back of the headboard and hung the headboard from two screws I had screwed directly into studs.

I can’t tell you what a relief it is to finally have a bed that is sturdy and relaxing. And the best part is that it was CHEAP! I paid $65 for the new metal bed frame, and about to make $50 the headboard. Not to shabby…

IMG_3090

IMG_3100

sig

What I’m Loving Right Now

Wednesday, April 14, 2010

This outfit from Anthropologie. Don’t ask me why, but I want it…for a tenth of the price, of course. 

Anthro 1

It may have something to do with this belt. Look at the adorable flowers!

Anthro belt

The cherry blossoms in my back yard…even though every tree in the city is giving me outrageous hay fever…achoo!!! Whew! Excuse me.

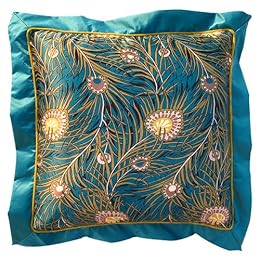
This pillow from the Liberty of London line at Target. Of course, you may have noticed I have a slight fetish obsession love for pillows. It’s kind of different, but very cute in person.


Pretty much every room in this cottage designed by Angela at The Painted House. Check out this post, and this, and this. You won’t be sorry.


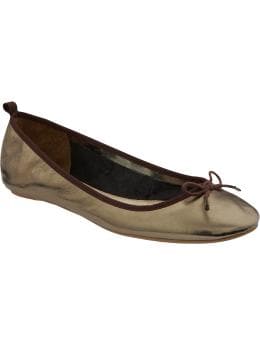
These ballet flats from the Gap. I have them in bronze and they’re soooo comfy. They’re available in other colors too.

This Anna Maria Horner fabric. I MUST make something with it – perhaps this shirt I’ve been coveting that Lindsey made (Um Hi Lindsey – we met at Blissdom? You know, we chatted for like 20 seconds? Any chance you want to make that top for me?)

This self tanning lotion by Mystic Tan. I like to think it gives me a convincing, natural glow.


Have a great day!

Fun in the Garden

Tuesday, April 13, 2010

This isn’t what I wanted to write about today. Last Sunday I was all ready to wrap of one of my home projects that’s been dragging on forever. And then I went to breakfast with my son. While chatting over a southwest omelet and grilled cheese (who eats grilled cheese for breakfast?! it certainly wasn’t me), our conversation proceeded like this:

Coolio: I think it would be fun to start a vegetable garden.

Me: Yeah that would be fun. We’ll have to look into it.

Coolio: No, I think it would be a fun thing to do today.

Me: Today?!! But we don’t know anything about starting a garden.

Coolio: That’s okay. We’ll just give a try. If nothing grows we’ll still have fun trying.

Okay, how can you argue with that. So we spent Sunday afternoon planting a garden that will most likely not grow :).

So we headed off to Home Depot and I veered towards the miniature tomato plants…but Coolio thought it would be more fun to plant seeds. Okay then… He picked out Garden Beans, Summer Squash, Carrots, Pumpkin, and Cantaloupe…yes, cantaloupe. I drew the line when he wanted to plant corn. I just couldn’t imaging wading through corn fields in our backyard.

IMG_3050

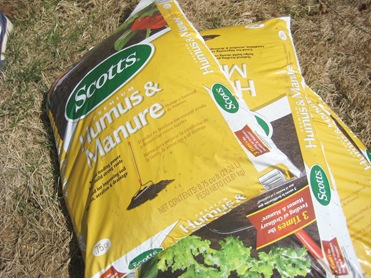
He also had apparently heard somewhere that manure was the perfect stuff to grow vegetables in, so we purchased 4 bags of “Premium Humus & Manure”…mmmm.

IMG_3046

Coolio then went to work loosening up the soil in our impromptu garden bed, and then mixed in the manure.

IMG_3045

Kingsley was enormously helpful. As was I, as I stood by with my Route 44 Diet Coke from Sonic.

IMG_3049

IMG_3051

I did take the time to make some lovely little garden stakes, though.

IMG_3055

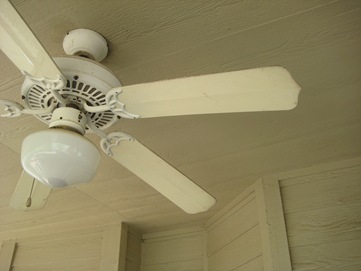
I also investigated our back deck and noticed something odd on the ceiling fan (and by “odd”, I apparently didn’t mean dirt, grime and dead bugs. In case you’re wondering, I have in fact heard of a little thing called “cleaning”).

IMG_3053

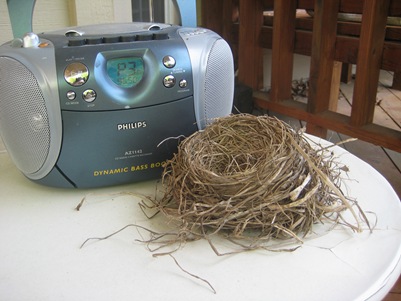
An industrious little bird had decided to build a nest on top of one of the fan blades. Thank goodness we hadn’t turned it on, AND that there weren’t any little eggs in there. I was stunned at what a perfect little nest it was, though. Nature! Amazing!

IMG_3052

After all “our” work was done, we had our own little vegetable garden. As I said, I’m fairly certain that it won’t produce a bountiful harvest for us, but it definitely was fun.

IMG_3056

sig

Easy Ways to Bring Spring into Your Home

Thursday, April 8, 2010

1) Switch out heavy fabrics, blankets and pillows for light weight cotton and linen.

2) Clip blooms from your garden and display them in your home, or splurge on some fresh tulips from the store.

3) Crack a window and let some fresh air into your house.

Country Living Bedroom-white-linens

(imagine there’s a breeze flowing through this room…tough to get a photo of an actual breeze)

4) Add an inviting door mat and a pot of flowers by the front door.

How do you bring Spring into your home?

sig

Image Credits: 1) Country Living, 2) Country Living, 3) Martha Stewart, 4) Country Living